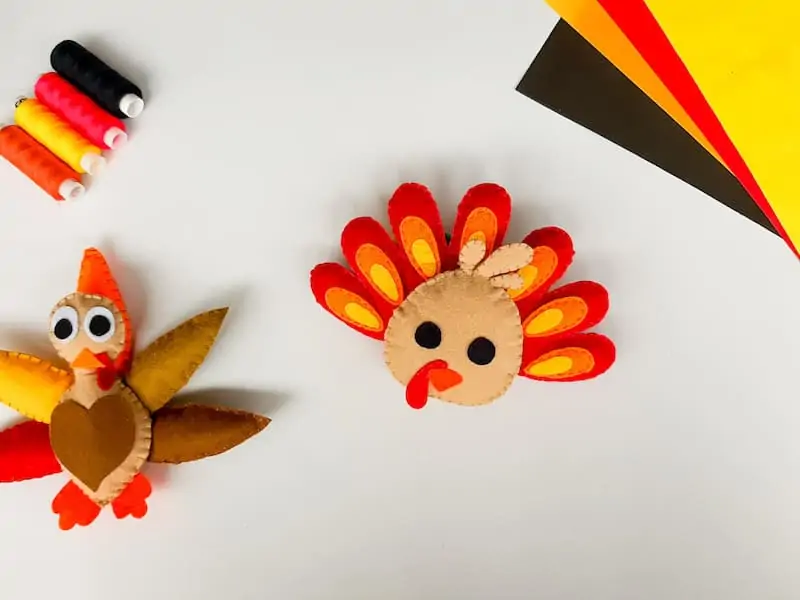
Whether you’re looking for a fun activity to do with your kids or just want to add some holiday flair, this cute Thanksgiving felt turkey craft is the perfect holiday project.
Not only will it be an adorable decoration in your home, but it can also double as Christmas tree ornament!
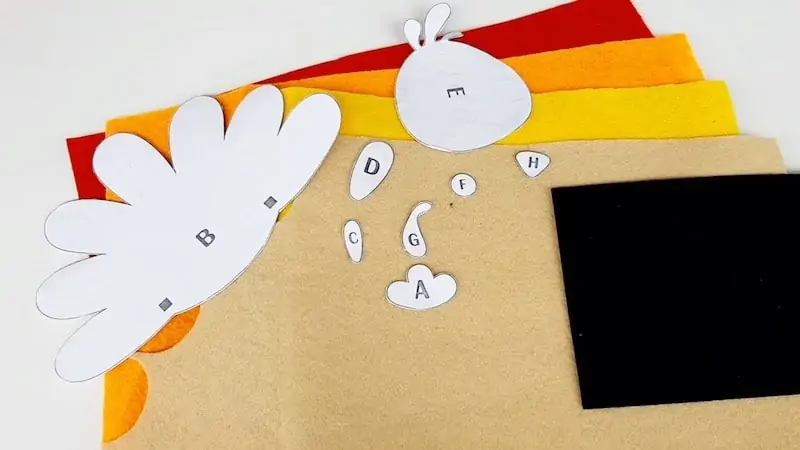
Plus, we’ve included a free printable template that makes creating this little guy super easy and fun.
This easy Thanksgiving craft uses simple materials like felt, stuffing and cotton thread.
You can even just use it with construction paper and make it a cut and paste activity instead!
First let’s take a look at some fun facts you may not have known about turkeys!
Fun facts about turkeys
- Domestic turkeys are descendants of the Wild Turkey, a species native only to the Americas
- The average lifespan of a turkey is 3-5 years.
- Turkey feathers have been used to make combs, brushes, and other items. They have also been used to stabilize arrows.
- A female turkey can lay up to 10 eggs per month (about 2 per week).
- Wild turkeys are one of the most intelligent birds known today.
- Wild turkeys are fast! They can fly up to 55 miles per hour and run up to 20 miles per hour.
Thanksgiving Day Family Activity
Thanksgiving is a wonderful holiday filled with family and friends. It’s also a busy time of year for families.
Between shopping, cooking, cleaning, decorating, and setting the Thanksgiving table, there isn’t much time left for fun activities.
While one or two people are inevitably in charge of deep frying the turkey without burning down the house and making the best Pumpkin Spiced Latte‘s ever – the kids and a few relatives are usually relaxing the day away.
The little turkeys, I mean kids, are likely asking every 5 minutes if it’s time to eat yet, right?
But this day doesn’t have to be stressful. In fact, it can turn out be a lot of fun if you plan ahead and try something new this year!
Making easy Thanksgiving crafts together could even become a new favorite tradition.
What sewing level is this felt turkey pattern?
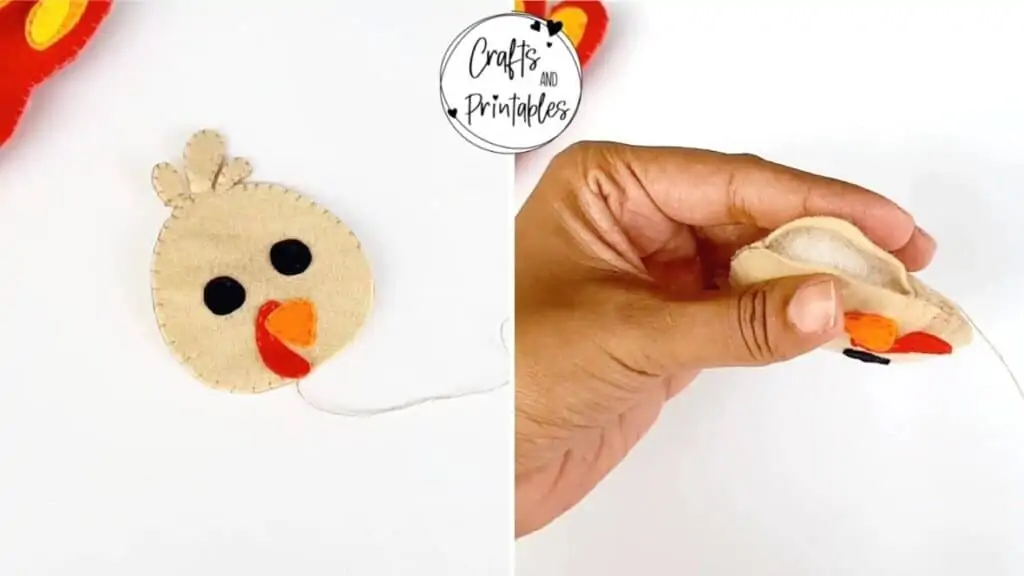
My cute turkey felt plushie craft is suitable for those with beginner to intermediate hand sewing or embroidery skills.
You should know two basic hand stitches (running stitch and blanket stitch) as well as how to start and finish off your thread work.
This felt plushie pattern is not overly difficult, but it does require several steps that take some time.
For those with experience, this project should only take about 1 hour. But for beginners, I would budget an extra half-hour just in case.
If we’re talking about kids, this could turn into a multiple day project depending on their attention span.
Whatever the case, it’ll be fun and keep idle hands busy while prepping for Thanksgiving dinner or whatnot.
How can younger children participate?
If you want to get younger children involved, you can turn this kids craft into a cut and paste activity.
Just use colored construction paper and a glue stick to construct the turkey.
Place him on a green or brown background and have the kids draw or cut out things like trees, the sun, clouds, people, etc to complete your thanksgiving day celebration scene.
You could also stay with felt or fabric, and simply use craft glue instead of a thread and needle.
What do I need to make this felt turkey craft?
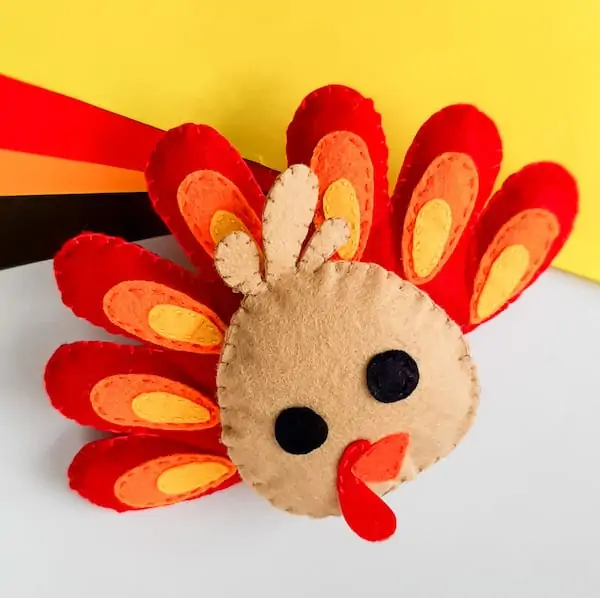
This DIY felt turkey plushie measures approximately 4 1/2 inches tall and 7 inches wide.
Everything is cut from crafting felt and sewn together by hand. The eyes, beak and snood are embroidered using coordinating thread.
The head is attached to the body at the end using hot glue, but you could also use crafting glue or sew these together, if you prefer.
More craft ideas using this same pattern – you could turn this into a cute keepsake Christmas tree ornament or hang it in a Christmas banner.
Just sew in or glue on a loop of ribbon at the top of the middle feather on the body piece.
Where to buy felt for this turkey plushie pattern?
Your best bet is to head over to your local craft store and look for the remnants table as this pattern doesn’t require very large pieces.
I also love this rainbow pack of craft felt from Amazon.
Can I use fabric instead of felt?
Yes, you can use any fabric you like! Feel free to switch out the felt for other fabrics you may have in your stash.
This would look really cute in random fabric patterns with coordinating colors – sort of like a patchwork quilt!
You could use cotton, flannel or even fleece. Anything goes in arts and crafts and usually the wildest ideas turn out the best.
This is an excellent scrap busting project due to it’s smaller size so just throw a pile on the table and let the creator’s imaginations go wild.
What do you use for stuffing?
Most people use store bought Poly-fil as stuffing, but there are lots of alternatives if you don’t have that on hand.
- Fill it with pot pourri to make a room or drawer freshener
- Pull apart and fluff up some cotton balls or cosmetic pads
- Repurpose an old pillow’s stuffing
- Save and cut up your scrap felt pieces
- Repurpose old t-shirts or towels
Do you have a video tutorial?
Yes, we do have a video tutorial. If you prefer to watch a sew along, here is my video showing how to make a cute felt Turkey plushie.
Do you have more felt ornament patterns?
Yes, we do! You can find them here.
Cute Felt Turkey Craft Tutorial
Give thanks for the little things.
It’s easy to get caught up in all of the big things that we have going on, but it can be worth remembering how much our kids appreciate everything from a handwritten letter to a fun craft project like this hand sewn turkey felt plushie.
This is an especially great time of year to spend some quality time with your children and make memories with them.
So grab your needle and thread and follow along as we show you how to make one of our favorite Thanksgiving crafts for kids. Turn some simple felt into a cute, cuddly felt turkey!
Get the step-by-step instructions and free pattern on our Crafts and Printables blog here.